surtly
Manage your team
Invite teammates and configure their provider access.
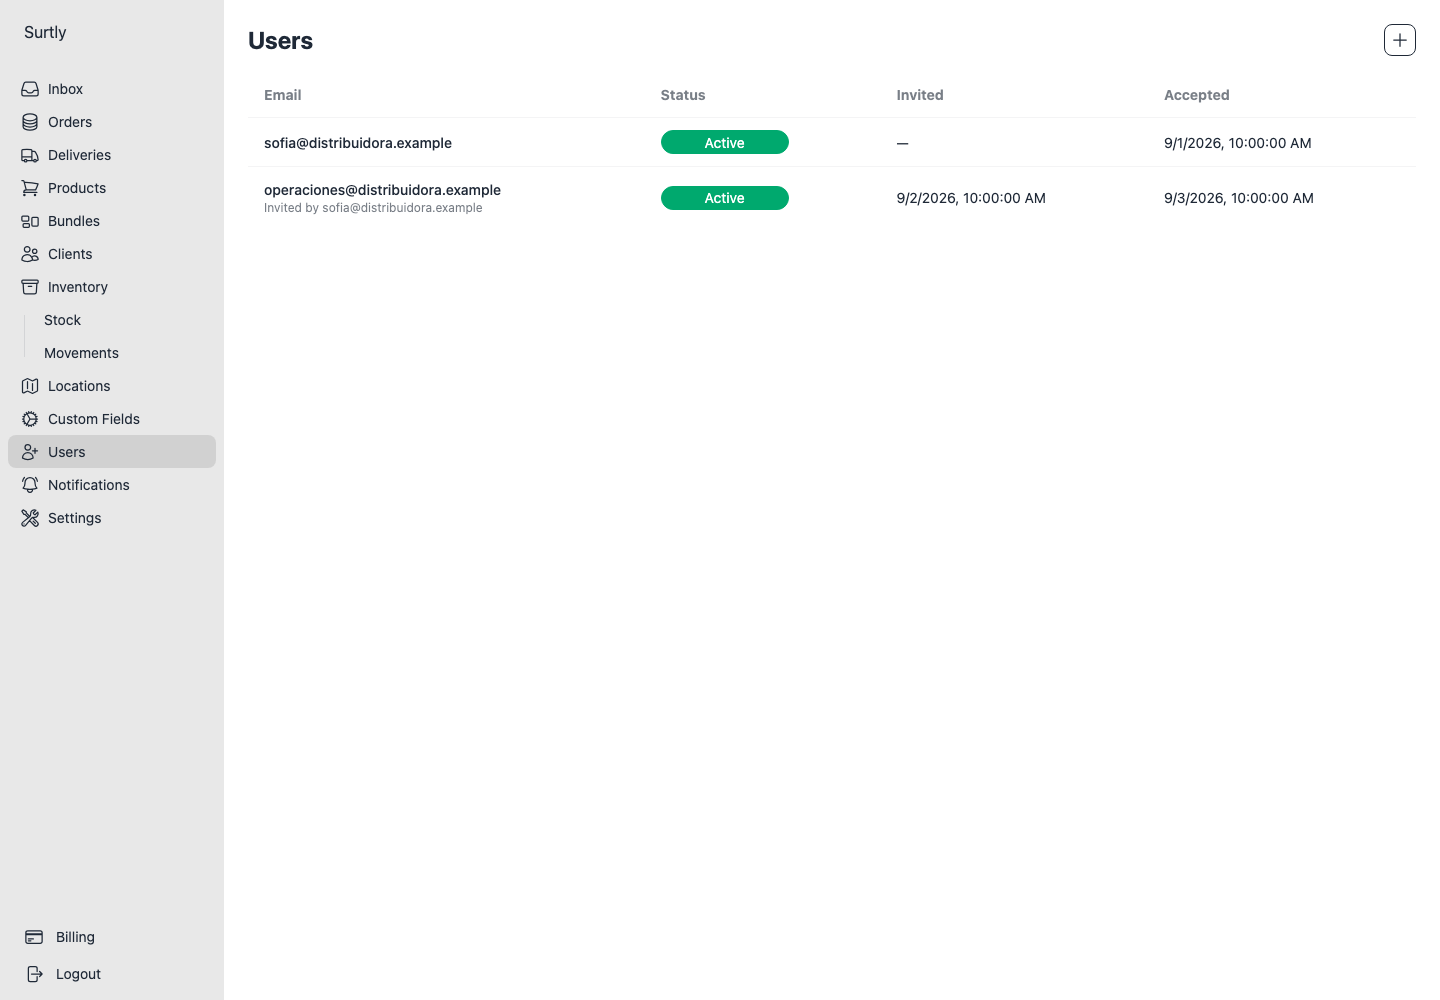
Invite a teammate
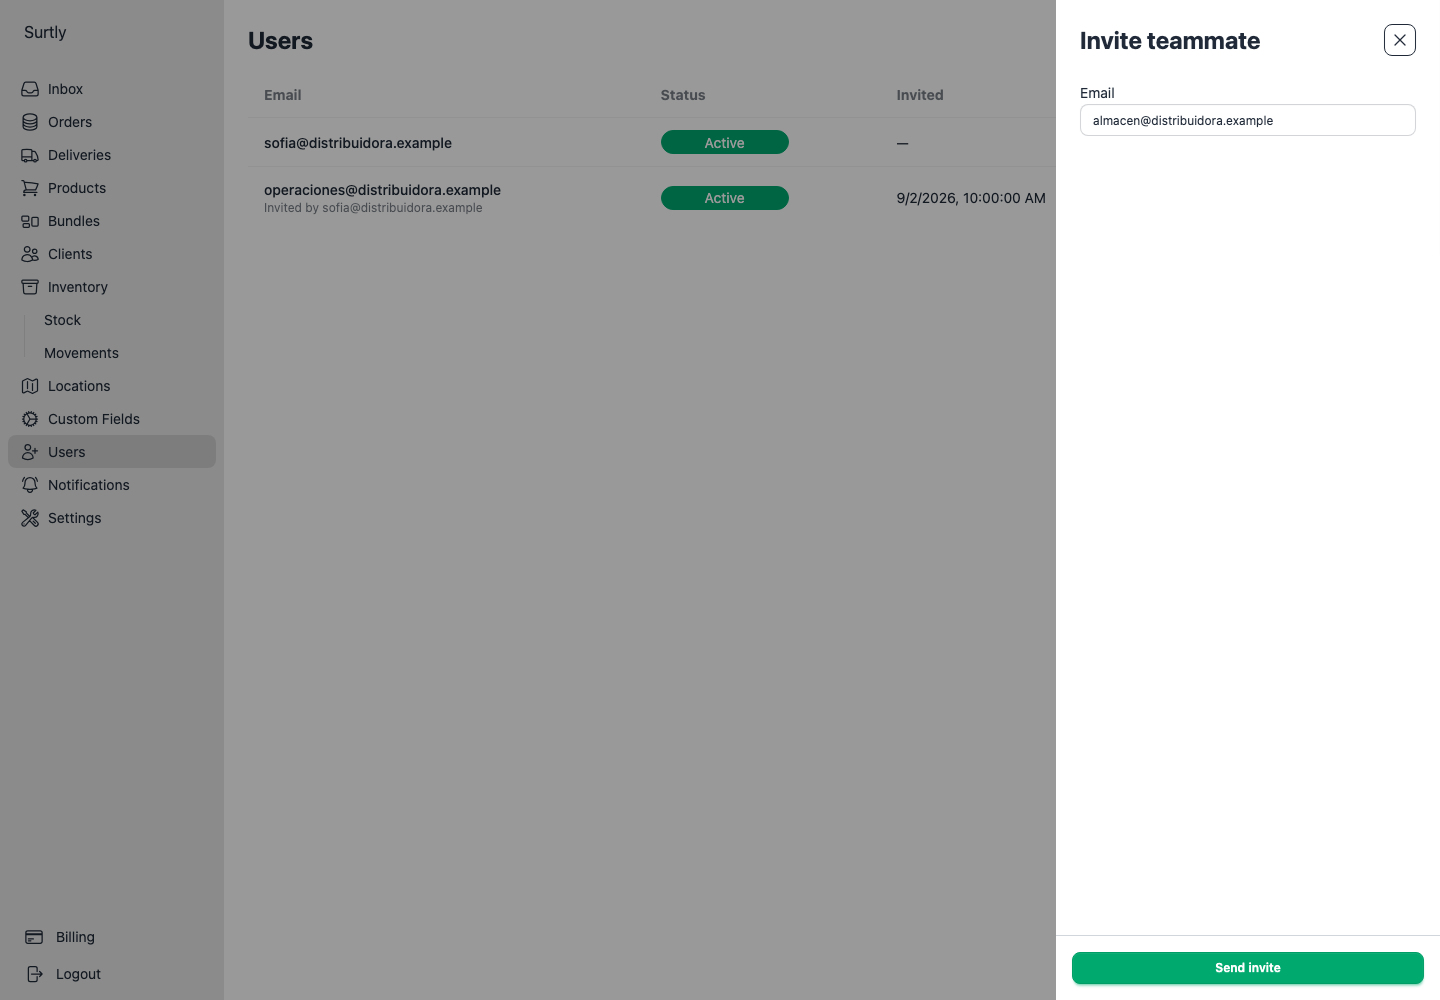
Open Users → + with Admin access, enter the teammate's Email, and choose Send invite. The invitation form only asks for an email. The teammate follows the email link and sets their password to join the existing provider.
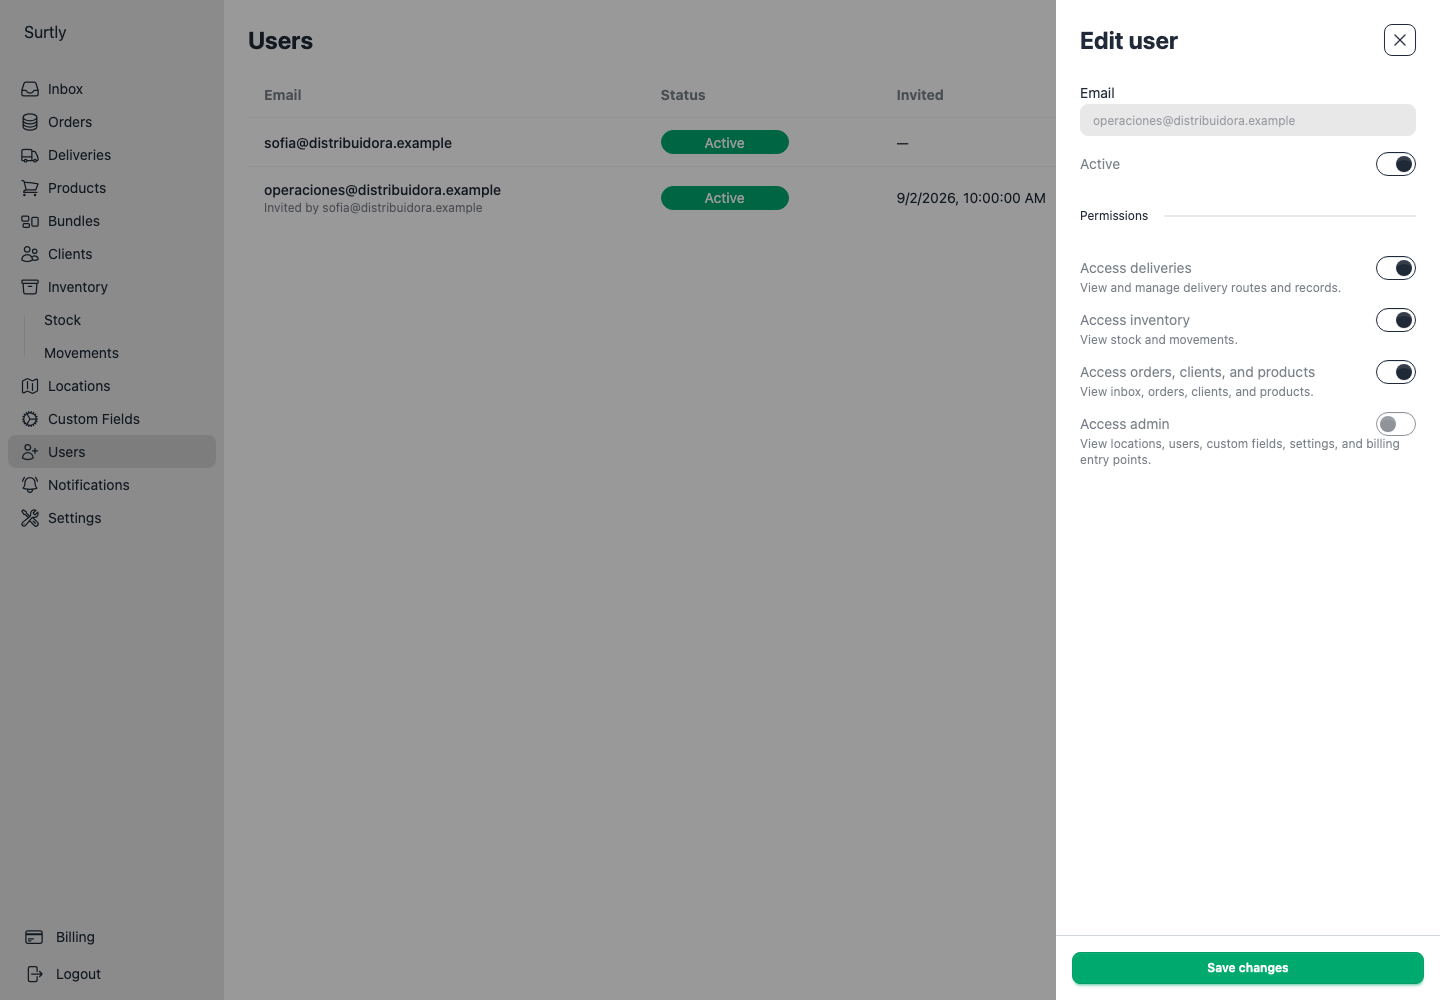
New invitations start with all four access areas enabled, including Admin. After sending, open the pending teammate's row, adjust Permissions, and choose Save changes. Configure their access before they join.
Choose access areas
| Area | Typical work |
|---|---|
| Deliveries | Dispatch and record delivery outcomes. |
| Inventory | Read stock and record inventory changes. |
| Orders/Clients/Products | Manage clients, catalog, and orders. |
| Admin | Manage business settings, locations, team, and administration. |
Keep at least one access area enabled. The editor exposes these four areas, not separate permission switches for each individual action. Some actions may still be disabled by additional permission checks.
Manage invitations and membership
Review pending and accepted status. Before invitation acceptance, the Active switch is disabled. For a pending invitation, Send reset email sends a password reset email; follow the actual email received to complete access.
For an accepted teammate, edit access or deactivate/reactivate the membership. You cannot edit your own membership from this screen. Have another authorized administrator make the change if needed.
The primary membership with Admin access manages Billing. Missing menus can be an access issue; verify permissions before treating them as missing features.